

Professional HDMI Coaxial Cable Selection Tips for Broadcast and AV Pros
2026-11-16
Live productions don’t leave room for signal surprises. Yet the HDMI coaxial cable is often the last component anyone upgrades—until a flicker on the multiviewer forces a rethink. Choosing the right cable for broadcast and AV isn’t about chasing the highest number on the package. It’s about impedance stability, shielding against interference, connector strain relief, and real-world distance limits. EBCYX designs with those field conditions in mind, and this guide brings that same practical lens to your next cable decision. Here’s how to pick without the guesswork.
Not All 'HDMI Coax' Is Actually Coax: Checking Construction Before You Trust It
Walk into any AV supply shop or browse an online catalog and you'll see spools labeled 'HDMI coax' — a term that suggests a single, standardized cable construction. The reality is messier. Some of these cables are true coaxial designs, with a central conductor wrapped in a dielectric, then a braided or foil shield, and finally a jacket. Others are simply twisted pairs or even parallel conductors dressed up in a round jacket to look the part. The label doesn't tell you which one you're getting, and that matters when you're pulling cable through conduit or running long distances where signal integrity hangs in the balance.
Before you trust that reel, take sixty seconds to check the build. Strip back a half-inch of the outer jacket and look at what's inside. A genuine coax cable will have a single solid or stranded center conductor surrounded by an insulating layer, with a shield wrapped or braided around it. If you see two or more insulated wires twisted together, or a flat pair hiding under a round jacket, you've got something else entirely — call it a video cable, a twisted-pair extender cable, or just marketing spin. The difference isn't cosmetic: true coaxial construction provides a controlled impedance path and consistent shielding, while imposters can introduce reflections, crosstalk, and signal dropouts over distance.
The next step is to test under real conditions, not just on the bench. Run a 4K signal through a hundred-foot length and watch for sparkles, dropouts, or handshake failures. Bend the cable around corners as it would be installed. Flex it. Check the connectors — are they compression-fit or just crimped on? A cable that passes a short bench test may still fail when stuffed behind drywall. The label 'HDMI coax' is not a specification; it's a suggestion. Trust what you can see and measure, not what's printed on the box.
The 100-Foot Problem: Why Signal Loss Kills More Installations Than Connectors
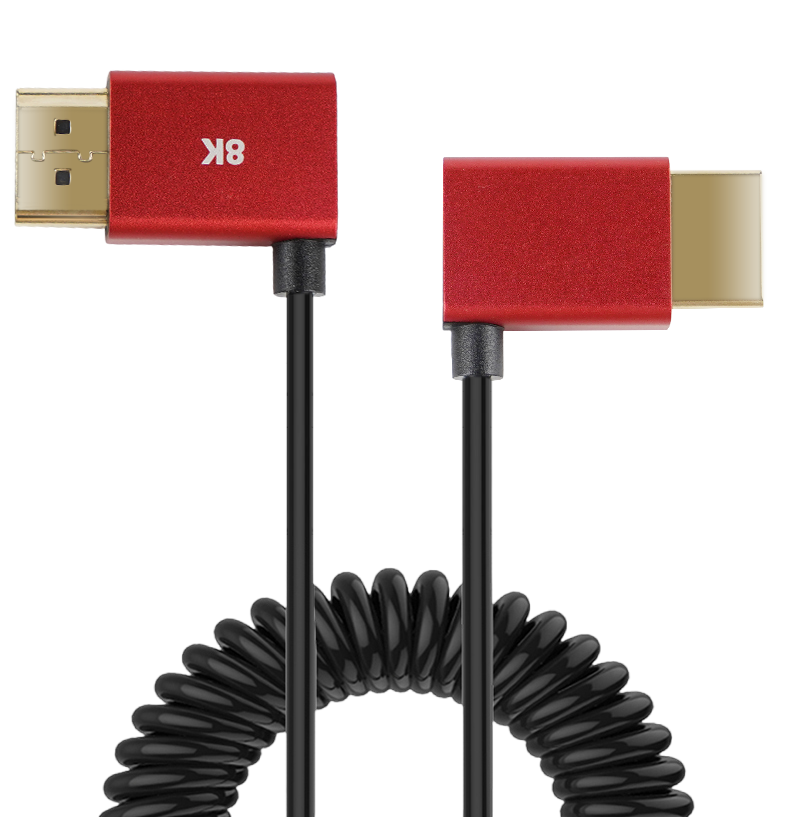
At 100 feet, the cable itself becomes the primary obstacle. Most installers fixate on connector quality, but the real culprit is the accumulated resistance and dielectric loss along that length. A high-quality connector might add a fraction of a decibel, while a 100-foot run of marginal cable can easily drop several decibels at high frequencies. That gap is what turns a crisp 4K signal into a flickering mess or a failed handshake.
High-frequency signals are especially vulnerable because skin effect and dielectric absorption turn long copper runs into unintentional low-pass filters. By the time the signal reaches the far end, the eye pattern has collapsed, bit errors multiply, and the link either degrades visibly or refuses to negotiate. Many installers chase the problem by swapping connectors or re-terminating ends, but those fixes do nothing for the 100 feet of copper in between.
The practical takeaway is that distance budgets must be settled before installation, not after. Thicker conductors, low-loss dielectric materials, active signal regeneration, or switching to fiber all outperform the practice of obsessing over connector brands. At the 100-foot mark, the cable's physical properties dominate the outcome; connectors are merely the final few inches of a much longer story.
Don't Buy for Today's 4K: Matching Cable Bandwidth to Future 8K Workflows
Most cable purchases get locked into the resolution you're shooting right now. That's a short-sighted move when 8K pipelines are already knocking on production doors. A cable rated for 4K/60p over HDMI 2.0 will choke the moment you try to push 8K/30p or 4K/120p through it. Think of bandwidth as the real specification, not the connector type. You need a cable that clears at least 40 Gbps for uncompressed 8K/60p with 4:2:0 chroma, and ideally 48 Gbps for full 4:4:4 or higher frame rates.
The practical difference hits during signal handshakes and long cable runs. A copper cable that works beautifully for 4K HDR over 3 meters may drop frames or fail entirely when you swap in an 8K source. Fiber optic HDMI or active optical cables handle future bandwidth with far more headroom, but they cost more upfront. The smarter spend is to buy for the highest spec you expect to use within the next two to three years, not the exact spec of today's camera. Otherwise you'll be pulling walls apart or re-rigging cable trays twice.
Also watch the certification labels. A cable stamped with the Ultra High Speed HDMI label is tested for 48 Gbps, which covers 8K/60p and 4K/120p. Anything less, like Premium High Speed, caps at 18 Gbps and will bottleneck future workflows. For professional environments, look beyond the consumer labels and ask for eye diagram test results or bit error rate data. That level of detail separates cables that merely pass a spec sheet from cables that survive real-world signal integrity under load, across temperature swings, and through repeated connection cycles.
Solid Copper vs. Copper-Clad Steel: A Ten-Second Scrape Test
Scraping a patch of surface coating is the fastest way to tell solid copper from copper-clad steel without any fancy tools. Grab a knife, a coin, or even a key. Pick an inconspicuous spot, like the bottom edge of a grounding rod or a scrap piece of wire. Scrape away the outer layer with firm pressure for about ten seconds. What you expose underneath tells the whole story.
If the metal underneath glows with a rich, orange-red hue and stays that color even as you dig a little deeper, you've got solid copper. The shine is uniform, soft, and almost buttery. Copper-clad steel, by contrast, reveals a silver-white or gray core after the thin copper plating wears off. The transition is abrupt—copper on the surface, steel underneath. Sometimes the steel will show a faint magnetic pull, so a small fridge magnet can be a handy backup check.
A word of caution: don't judge by the initial scrape alone. Some cheaper cladding uses a thicker copper layer, so you might need to scrape a bit longer or make a deeper groove. Also avoid scraping plated connectors or decorative fittings where you'd ruin the finish. For electrical grounding or RF applications, always verify at multiple spots, especially where the conductor was cut or bent, since those areas can expose the steel core prematurely.
Jelly-Filled and Corrugated Options for Broadcast Runs That Get Wet
When cable runs get caught in the rain or buried in damp conduit, standard jackets turn into sponges that slowly corrode the copper underneath. Jelly-filled cables flip that script by packing petroleum-based compound around each twisted pair, blocking moisture from ever reaching the conductors. The gooey barrier doesn't just repel water—it actively seals around small nicks and abrasions that would otherwise invite corrosion in a matter of weeks.
Corrugated options take a different route, using a ribbed metallic shield that shrugs off crushing forces while adding an extra layer of waterproofing. Those ridges aren't just for show: they create a slight air gap between the outer sheath and the inner core, letting any trapped condensation drain away instead of pooling at low points. For overhead drops or direct-burial runs where rocks and frost heave are constant threats, that wave-like profile absorbs impacts without kinking the pairs inside.
The real trick comes when you pair both approaches. A jelly-filled core with a corrugated copper or aluminum shield handles standing water, UV exposure, and the occasional backhoe graze without turning your broadcast feed into static. Installers tend to grumble about the mess of gel during termination, but a quick wipe with citrus cleaner beats replacing a hundred-meter segment after one bad storm.
Field Testing Without a $5,000 Analyzer: What Pros Actually Do
Instead of hauling a lab-grade analyzer to a muddy site, experienced techs reach for a handful of cheap tricks: a known-good reference signal, a simple diode detector, and a multimeter that has seen better days. They inject a tone at the input and walk the signal path with a scope probe, listening for changes in level or distortion that a fancy screen would graph but their ears catch faster.
Another approach is comparative testing. Pros keep a box of reference parts — a capacitor, cable, or connector already validated on a bench. Swapping a suspect component for a reference unit and watching whether the symptom follows the part or stays with the unit tells you more than an expensive analyzer ever will. When they need frequency response, a free smartphone app and a pink noise source do the job well enough for most field calls.
The real skill is knowing what not to measure. A seasoned field tech will often bypass the fancy tests entirely: if the issue disappears when you wiggle a cable, no spectrum analyzer will fix that. Documenting results with a phone camera and a notepad beats any software, and it is far easier to share with the shop. Pros spend money on rugged, simple tools — not on gear that needs a clean bench and stable power.
FAQ
Consumer cables usually hide thin center conductors and flimsy shielding inside a molded plug that cannot be serviced. Broadcast versions use solid copper or silver-plated copper cores, dual or triple shielding, and metal-shell connectors with field-repairable ends. The real difference appears under repeated coiling, foot traffic, and patch bay stress: fewer intermittent dropouts and far longer service life.
Keep passive runs as short as practical—ideally under 3 meters for 48 Gbps, and never more than 5 meters if you want reliable 8K. Add a little slack for rerouting but avoid tight service loops because bends create impedance changes. Beyond that distance, use an active optical hybrid or a powered equalizer designed for coax rather than chaining passive cables.
Die-cast metal shells outperform molded plastic because they survive being stepped on and yanked. Thick gold plating on contacts prevents oxidation after hundreds of insertions. Strain relief must grip the jacket, not just the solder joints, and a locking latch helps in racks. Field-repairable connectors—solder-cup or screw-terminal—let you fix a crushed end in minutes without replacing the whole cable.
Solid copper handles higher frequencies and longer distances with less loss, so it is the safer choice for 4K/8K broadcast runs. Copper-clad steel can work for short jumpers where mechanical strength is the priority, but it adds resistance and may fail at high bitrates. Silver-plated copper is the preferred upgrade for outside broadcast use because it stays cleaner under humidity and repeated flexing.
Shielding is often what separates a cable that works in the workshop from one that survives a live show. Look for at least a foil plus high-coverage braid—85 percent or better—because lighting dimmers, wireless mics, and power runs can punch through weak shields. If the cable passes signal in a clean bench test but drops frames on site, inadequate shielding is usually the culprit.
Move to hybrid when the run goes beyond about 10 to 15 meters, when 8K or high-frame-rate 4K is required, or when the path runs parallel to power lines. Coax still carries power and low-speed control, but fiber takes over the high-speed data lanes, eliminating copper attenuation and ground-loop issues. The trade-offs are higher cost and a larger minimum bend radius.
Request a sample and put it through a full signal generator and analyzer at the highest resolution and frame rate you will actually use. Do not rely on printed bandwidth claims; many cables degrade when warm or bent sharply. Inspect the center conductor material, shield construction, and connector plating, and order from a supplier that can document batch consistency. A small sample run costs little compared to replacing hundreds of installed cables.
Conclusion
Spec sheets rarely tell the whole story when you're pulling HDMI coax through a broadcast facility. The first move is to cut into a sample and verify the shield is actually a continuous copper tube or high-coverage braid, not a flimsy foil wrap pretending to be coax. That construction detail matters more than the connector, especially once runs approach 100 feet. At that distance, attenuation from thin center conductors and loose shielding quietly eats bandwidth, causing dropouts that get blamed on the transmitter or display. If you're planning for tomorrow's 8K workflows, don't buy cable rated only for today's 4K. Look for a bandwidth cushion of at least 48 Gbps and check the dielectric material, because foam polyethylene holds impedance better over distance than solid PVC. A ten-second scrape test on the center conductor also separates solid copper from copper-clad steel; if silver shows under the copper, walk away.
Outdoor or damp broadcast runs demand a different animal. Jelly-filled or corrugated copper shields keep moisture from wicking into the dielectric and causing corrosion, but only if the jacket is UV-stable and the connectors are sealed with proper boots. In the field, you don't need a $5,000 analyzer to catch most failures. Pros carry a known-good short jumper, a simple continuity tester with a load, and a laptop to run a 4K/60 test pattern for ten minutes. If the image holds without sparkles or audio dropouts, the line is likely stable enough for live use. The real trick is testing under load and at temperature, not just with a multimeter. Combine that with a physical inspection of the connector crimp and you'll avoid the majority of install headaches.
Contact Us
Contact Person: David Yang
Email: [email protected]
Tel/WhatsApp: 8615814734054
Website: https://www.ebcyx.com/